|
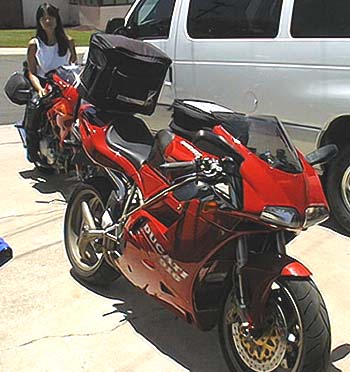
| The Ventura pack looks pretty dang big all by itself out there on the back of the 916. Pretty ironic that there's a big van right next to us that would have been sooo comfy... but then we'd be wusses like everyone else that drove to Laguna and didn't ride. I put the tools under the seat in two places - in the tray and behind the frame. The tank bag kept the clothes that I change into for the evening. We're loaded and ready to tour! |
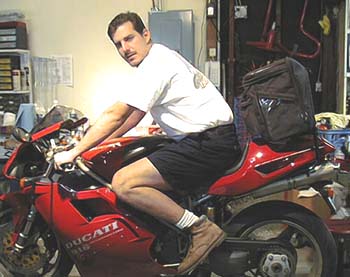
| Now put a rider on the bike and it doesn't look so bad. Seriously, while riding, I didn't know it was there. Not in the straights, not in the turns. This pack was totally stress tested into 3 digits and roosting in the twisties. Oh and a few "both wheel" free leaps over whoops, too. (Oops) There are a few riders that got themselves passed in the twisty bits on 58. Hope I didn't startle ya. |
|
| Zina said that from behind, it simply looked like I was wearing a large backpack. She said that it didn't look like it moved at all. I could see it bouncing a little in the mirrors when I looked. It didn't cramp me much at all, though I could lean back and touch it. This pack is their "Rally Pack" and is expandable from the size shown. This pack is totally killer and I've used it a few times to carry my gear while not on the bike. |
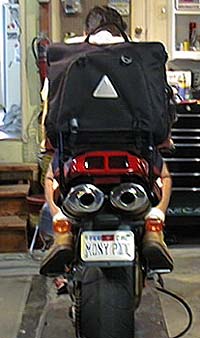
| Once you get to where you're going, take the frame out and leave it in the motel room. Go to the paddock with your butt looking like this. It's not bad at all. Since I'm probably going to use the Ventura Pack once or twice a year, I'm not leaving the "L brackets" on. |

|
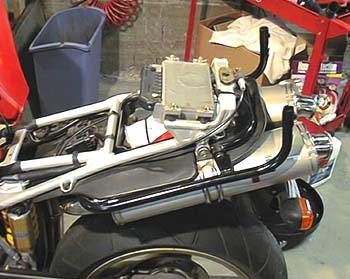
| The first step is to remove the wellnuts used to hold on the heat shield and mount the L brackets using screws and nuts where the wellnuts were. There is a U shaped bracket that goes around the back of the frame, to which the side L brackets bolt. The instructions say that the exhaust mufflers need to be removed. I simply removed the bottom subframe bolts and loosened the top ones, allowing me to pivot up the tail section and access to the heat shield bolts. |
| Put down the tailsection and slide in the pack rack frame. This took the most work, as the L brackets required a good bit of tweaking to allow the frame to slide in and out with some light taps of the hand. I suspected that the rack wouldn't be stiff enough to stay off the bodywork, so I folded over and stuffed a towel in the gap. |

|